letsacme is a Python script which simplifies the process of getting a free SSL/TLS certificate from Let's Encrypt. It takes a CSR (Certificate Signing Request) and gets the signed certificate and CABUNDLE (Certificate Authority Bundle) completing all the challenges automatically.
To automate the whole process (retrieving cert and installing with Cpanel) follow this tutorial instead.
You will need to follow this tutorial from start to finish just once, after that, from the second time around, you can just get the certificate with the python command mentioned in step 7 in 3. Get the certificate section and install it.
These are the steps in brief that you will need to go through to get free https for your websites:
- Generating CSR: You will need to generate a CSR either from control panel (cpanel or others) or from a command line interface or other methods.
- Preparing a challenge directory: There are numerous ways for this. In this tutorial we will use a single separate sub-domain created for the sole purpose of completing acme challenge.
- Getting the certficate: You will need to run the letsacme client with the generated CSR to get a signed certificate.
- Installing the certficate: Finally you will need to install the certificate on the server either with cpanel or other means.
1. Generate a CSR
You can generate the CSR by running a simple openssl command in terminal or from your control panel (cpanel or other) provided by your hosting provider. To generate CSR from cpanel you need two steps:
- Generate a private key
- Generate a CSR using the private key
Follow the steps in this tutorial to generate a CSR from cpanel.
2. Prepare the challenge directory
You need to create a sub-domain (named challenge.yourdomain.com) which will be used to complete acme-challenge (the acme protocol requires you to complete some challenges to prove your ownership of the domains you need certificate for). Then you will need to set a redirect rule (for each of your domain) that redirects all request to yourdomain.com/.well-known/acme-challenge to a directory under the newly created sub-domain.
Create a sub-domain
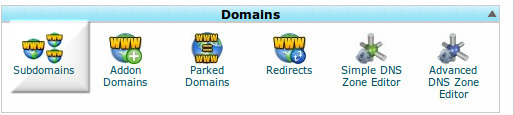
To create a sub-domain with cpanel simply login to cpanel and go to the Domains section and create a sub-domain named challenge.yourdomain.com. Select the Document Root to be directly inside home directory, not inside public_html, that is, just put challenge where it is asking for Document Root. Then click on create.

Setup redirect
The acme protocol looks for a file with URL yourdomain.com/.well-known/acme-challenge to justify your ownership of the domain. This URL needs to be accessible with normal http over port 80. This may not be possible all the time, and also if your site is behind some firewall or if it is created with any framework/tool like Laravel, Wordpress etc... then there may arise several complications accessing that acme-challenge directory. This is the sole reason we have created a separate sub-domain to complete the challenges.
Don't install any framework in this sub-domain, keep it plain and simple.
The basic logic behind this step is to redirect all requests to yourdomain.com/.well-known/acme-challenge to that plain sub-domain which allows simple http access over port 80. This is though a bit peculiar, will work for all cases.
To setup redirect for servers running apache (this is generally the case for shared hosting) you will need to edit/create a .htaccess file inside the Document Root (the folder/directory where all the website data/pages are kept) of each of your domains (that you included in the CSR). Put the following rewrite rule just after the line RewriteEngine On in .htaccess file:
RewriteRule ^.well-known/acme-challenge/(.*)$ http://challenge.yourdomain.com/acme-challenge/$1 [L,R=302]RewriteEngine On to begin with, put this line before the above rewrite rule.
In the above rewrite rule challenge.yourdomain.com is the subdomain you just created. It is the same for all the rewrite rules for all the other domains, that is edit the above rule and change yourdomain.com to your actual domain (root domain not any subdomain) and then use the same rule in .htaccess file for all of the domains. For example, if I were to do this for the domains example.com, forums.example.com, wiki.example.com then the one and only rewrite rule would be:
RewriteRule ^.well-known/acme-challenge/(.*)$ http://challenge.example.com/acme-challenge/$1 [L,R=302]3. Get the certificate
To get the certificate using the letsacme client you will need to login to the remote host and open a terminal/console to run a Python script. I will use ssh to login to remote and run the necessary commands in this tutorial. How to use ssh or how to set it up is out of the scope of this tutorial. I am assuming that you already have ssh installed/set-up in your system. If you don't have ssh but can login to remote host by other means and run the commands, that will do too.
To be concise, you will need to run certain commands on remote host.
To run the script we will need some basic tools on remote host (these are generally installed by default).
- Python
- openssl
- git or (wget and tar) - optional
-
First login to the remote host, that is, open a terminal on remote host. With ssh you can run this command:
port is the port number (generally 22), user is the username (for cpanel hosting, it's cpanel username) and domain is the domain name. An example:ssh -p port user@domain
If the login was a failure then you will need to install ssh first, or correct the command if it was wrong.ssh -p 22 myusername@example.com -
Now, if login was a success, you are at remote host, that is, you will be able to run commands on remote host from this terminal/console. Let's check if the required tools are available in the remote.
-
Run
python --versionto test if python is available. It should show the version info of Python. -
Run
openssl versionto test if Openssl is available. It should show the version info of Openssl. -
Run
git --versionto test if git is available. It should show the version info of Git. If it is not available then check forwget --versionandtar --version, both should show their respective version information.
-
Run
-
All testings are done. Now you need to get the letsacme client. If Git is available, run the following command:
If git isn't available but wget and tar is, then run these commands one by one:git clone https://github.com/neurobin/letsacme
What the above does is download the letsacme client. If neither Git or wget/tar is available, then you can download the letsacme client from here, extract it and upload its contents in a folder/directory named letsacme directly under your home directory (/home/user/letsacme) in remote host; you can use ftp client like Filezilla to do this. Remember this folder/directory, we will refer it as letsacme directory.wget https://github.com/neurobin/letsacme/archive/release.tar.gz tar -xf release.tar.gz mv letsacme-release letsacme -
If the previous step is a success then the letsacme client is installed in your remote machine. Go inside that (install) directory with a cd command:
We will do all the things necessary inside this directory.cd letsacme -
Run this command to create a Let's Encrypt account key:
openssl genrsa 4096 > account.key -
Upload your CSR (Certificate Signing Request) file into this directory (use the file name domain.csr for convenience). Or you can copy-paste and create the domain.csr file. For copy paste, Run this command:
then copy the CSR (from cpanel or a saved text file or whatever) and paste it into terminal. Then press Ctrl+D or equivalent to terminate the input in the terminal/console. It will create a file named domain.csr. You can check if it is created by the command `ls -a` (it will show a list of files and folders/directories). If you choose to upload the CSR file instead of copy-paste-create from terminal, you can use ftp client like FileZilla to upload it.cat >domain.csr -
Run the following command to get the certificate:
The ~/challenge/acme-challenge part needs to be changed to the actual path of the acme-challenge directory under the challenge completing sub-domain. **account.key** is the Let's Encrypt account key file. **domain.csr** is the CSR file. If you have followed my tutorial to-the-point and word by word, you can get away without changing anything at all in the above command. The certificate along with the CABUNDLE (aka chain) will be printed on screen and also they will be saved in files named signed.crt and chain.crt respectively. On screen, you should get two entries withpython letsacme.py --account-key ./account.key --csr ./domain.csr --acme-dir ~/challenge/acme-challenge --cert-file ./signed.crt --chain-file ./chain.crt
construct. The first one is the signed certificate and the second one is the CABUNDLE (chain). You can also get the certificate printed on terminal with the following command once it is retrieved and saved by the above python command:---BEGIN--- something -----END---
and the CABUNDLE (chain) with the following command:cat signed.crt
And also you can download those files and save them in your local machine.cat chain.crt
4. Install the certificate
There are numerous ways for numerous circumstances or situations of installing the certificate in your server. For shared server/hosting it is generally through a user control panel (cpanel).
To install the certificate with cpanel follow the instructions on this tutorial. In that tutorial the cert.pem is the same as signed.crt, and the chain.pem is the same as chain.crt, the privkey.pem is not needed as it's already created with cpanel and thus available there. You can skip step 3 in that tutorial and when asked for private key, view the private key in cpanel (in a new tab in browser) and copy-paste the encoded key to the text field provided.
For other methods of installing the certificate you can view the readme file of the letsacme client.